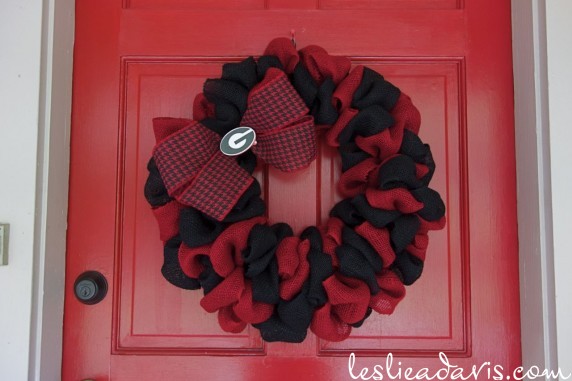
We are so excited at our house that football season is starting back up! With a nice deep front porch at the new house, I am looking forward to having a wreath up year-round, without worrying about them weathering or fading. I made a red and black wreath this weekend to kick off our UGA bulldog season. I used this burlap ribbon wreath tutorial as a guide. This wreath on etsy was my inspiration for color and style. For making the bow, I used this tutorial.

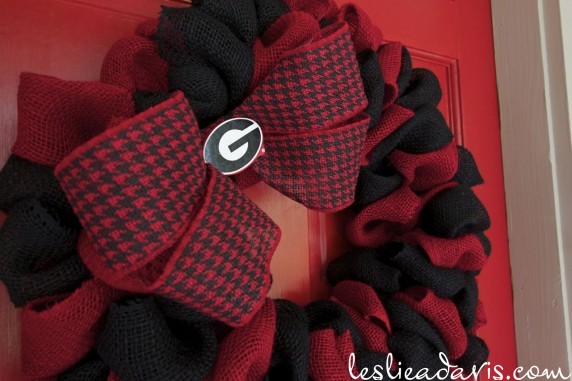
I found the burlap ribbon and houndstooth burlap wired ribbon for the bow at Hobby Lobby. They were having a 50% off sale, so I got the wire wreath and ribbon for $22 (I already had floral wire). The Georgia ‘G’ was a Christmas ornament I picked up last year, so I don’t remember the cost for that. It is hot-glued to the center of the bow.

Bradley loves the wreath, and I’m still a little on the fence. I think it seems little frumpy to me(?) Either way, it was not difficult to make and took me only a couple of hours from start to finish. Go Dawgs!
Update:
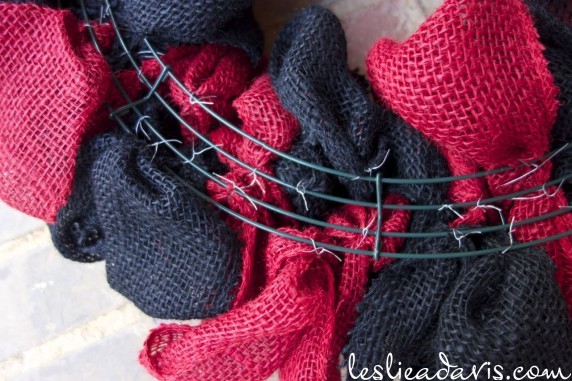
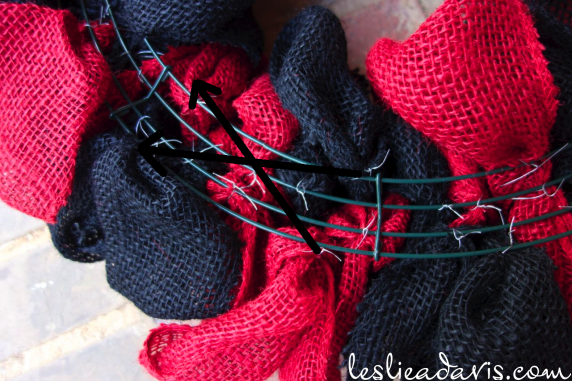
To answer a question about making this wreath with two colors of burlap ribbon, I will try to explain my process. I didn’t take any pictures while I was making it, because the tutorial I linked to has great pictures showing the process. I started with the red ribbon and made a loop on each of the two outer wires of the wreath form. Then I started the black ribbon the same way, but from the two inner wires of the wreath form. The third loop I made using the red ribbon was attached to the same wire as the second loop I made using the black ribbon, which in effect crossed over the black ribbon. Then I made a third loop in the black ribbon and attached it to the wire that the second red loop was attached to, so that I got an even distribution of color across the wreath. I took a close-up picture of the back of the wreath to hopefully help show the attachment of the ribbon on each wire.

And with arrows showing one section of cross-over:


how did you do the 2 colors
did you put a loop on each wire
please send instructions to my email
Hi Paula,
I followed the tutorial linked in the post, but I started with one color for a couple of loops on the two wires on the outside of the wreath form, then I would do a couple of loops of the second color on the two inner wires, then I made a third loop on the next to outside wire that crossed over the first color. Then I repeated until it was as full as I wanted it to be. Sorry I didn’t take any pictures as I was doing it – I made it up as I went along. I hope this helps.
thanks so much
i love to make wreaths
this one will be a new one to try
i have use burlap to make a rag wreath, what a mess
i finally did get the tutorial page but your explanation will make it even easier
how about an auburn or alabama ha ha
GOD BLESS!